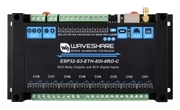
ESP32-S3-ETH-8DI-8RO
The Waveshare ESP32-S3-ETH-8DI-8RO and ESP32-S3-ETH-8DI-8RO-C are the main relays currently supported in Sensa Nomad. The main difference is ESP32-S3-ETH-8DI-8RO is for RS485 and ESP32-S3-ETH-8DI-8RO-C supports CAN.
If you are unsure, purchase the ESP32-S3-ETH-8DI-8RO-C model as the CAN model is useful for wired battery BMS options.
Install firmware on a new unit
The ESP32-S3-ETH-8DI-8RO-C supports both ethernet and wifi. We offer a firmware for each.
You will need:
- Your Waveshare ESP32-S3-ETH-8DI-8RO relay
- A USB-C cable that supports data (not charge-only)
- A desktop browser that supports Web Serial — Chrome or Edge on Windows, macOS, Linux, or ChromeOS. Safari and Firefox are not supported.
Steps:
- Plug the relay into your computer with USB-C.
- Click the Install Firmware button for your variant you require.
Wifi
Ethernet
- In the browser pop-up, pick the serial port for the device
(usually shows up as
USB JTAG/serial debug unitorUSB Single Serial).
If the port picker is empty, try a different USB-C cable — many cables are charge-only and won't carry data. On Windows you may also need to hold the AtomS3's side button while plugging in to force boot mode.
- Choose Install when prompted, then wait — flashing takes about a minute.
- When it finishes, unplug and re-plug the device to boot the new firmware.
Join Wireless Network
If you are configuring the relay for Wifi, follow these steps. This is not required if you are connecting your relay with ethernet.
Steps:
-
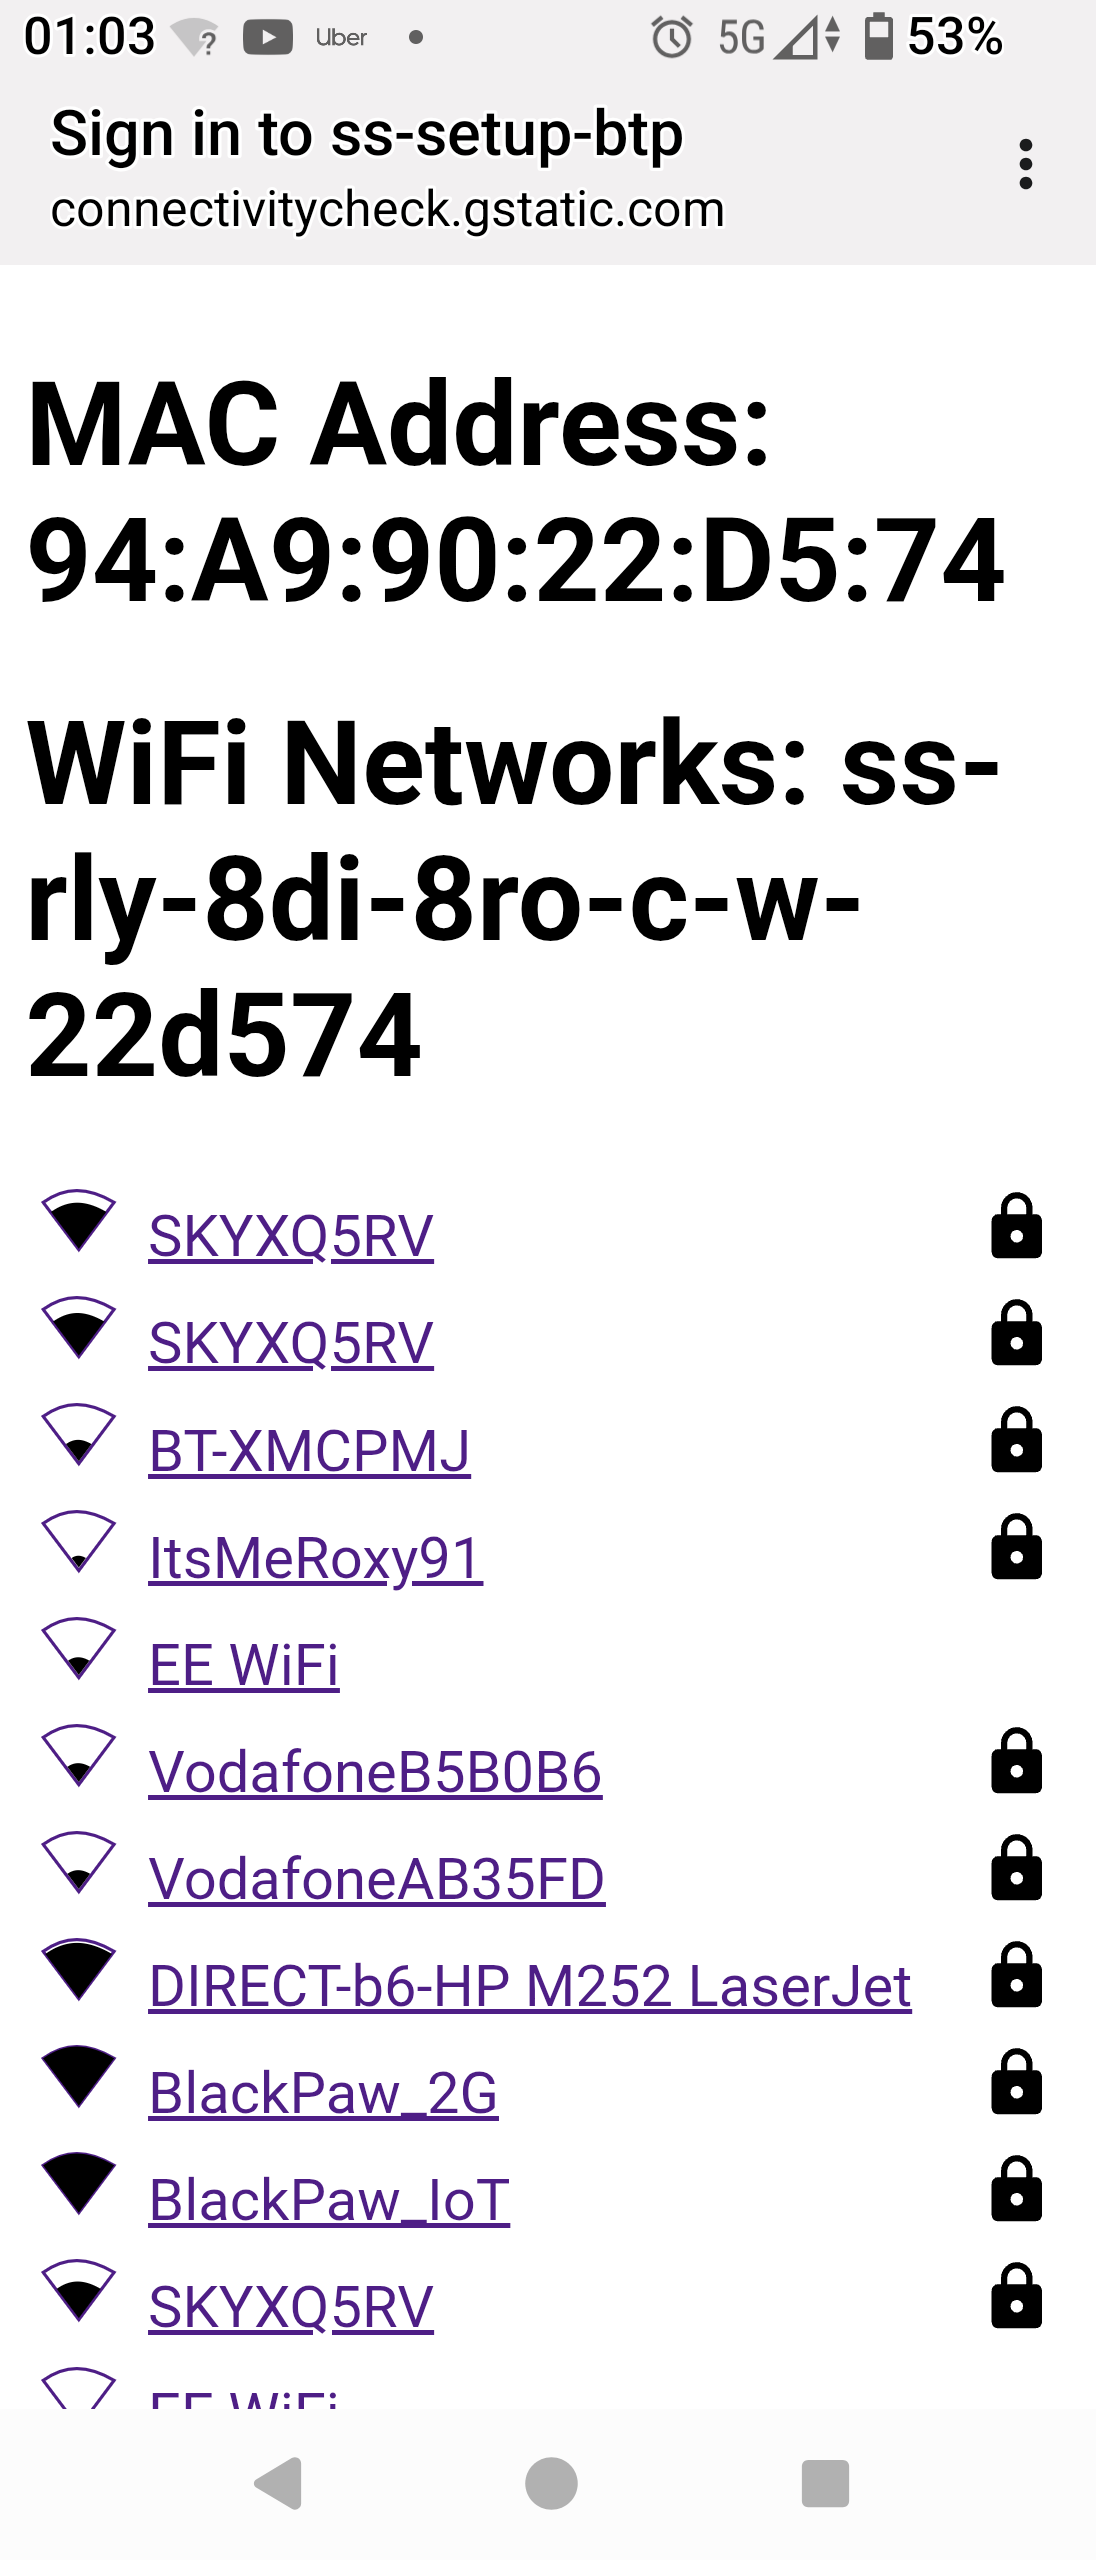
On your mobile or another wireless device, a new wireless SSID should appear named sen-setup-btp. Join this network, the password is sensasetup
-
You will then be presented with a list of all the SSIDs available, select YOUR wireless network and enter YOUR wireless password.
- Power off the device and power on. The device should then join your network.
Running Web Interface
The device has a basic web interface which is useful to ensure the device is running and check the logs.
Steps:
- Identify the ip address of the device from your wireless network. You should see the device on your router network. The device will be ss-rly-8di-8ro-e-xxxxxx for ethernet version or ss-rly-8di-8ro-w-xxxxxx for the wifi version, where xxxxxx is the last 6 characters of the MAC address of the unit.
- Connect to your ip address in your browser
- You will be prompted for a user and password, user: admin, password: sensaweb

Add to Sensa Nomad
If you are building a Relay for your Sensa Nomad installation, follow these steps.
Steps:
-
Click on Settings to show the Discovery page and click Scan. Your relay should now appear.
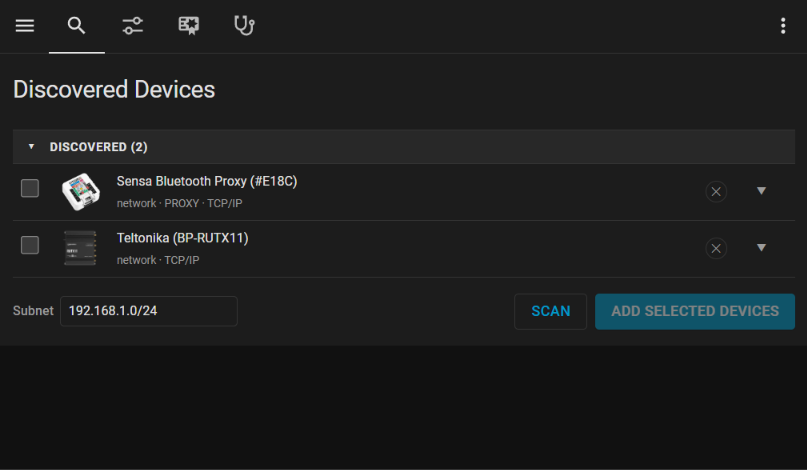
-
Select the device and click Add Selected Devices.
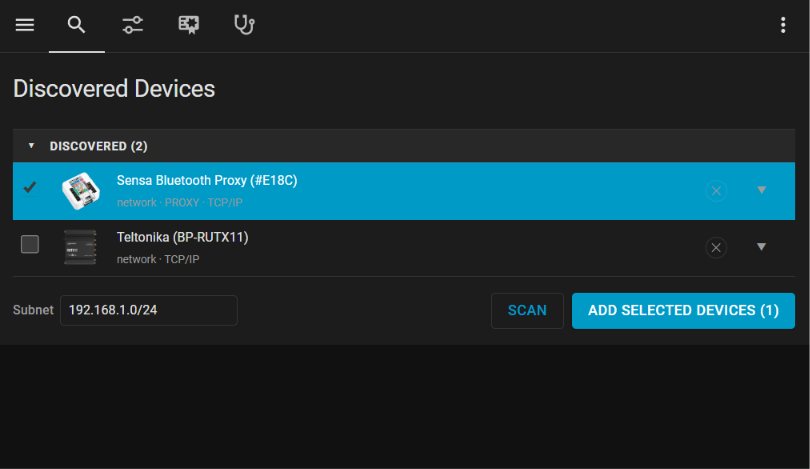
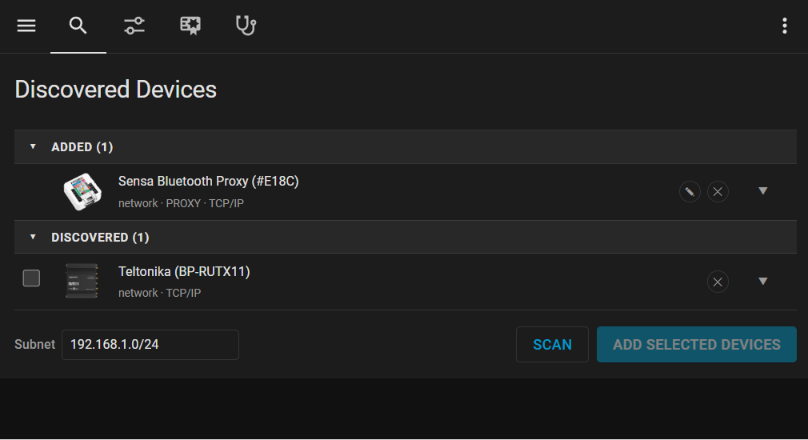
-
The device should now show in the Added group of devices.